new version 2.0 |
A completely new user interface : five new toolbars
This new version of RhinoCaptureTM provides five new toolbars in order to increase user interface experience and productivity.
RhinoCapture toolbar

1 |
2 |
3 |
4 |
Figure : « RhinoCapture » toolbar
Allows basic action to:
1: “Connect” Rhinoceros to SummitEvolution.
2: “Disconnect” Rhinoceros from SummitEvolution.
3: “Move to” the same position into RhinoCapture as selected in SummitEvolution.
4: Display RhinoCapture options grid.
Snap to objects toolbar

1 |
2 |
3 |
4 |
5 |
6 |
7 |
Figure 2 : « Snap to objects » toolbar
Allows different snap operations to:
1: Switch ON/OFF the “Snap to objects” state.
2: Switch snap from 2d to 3d mode.
3: Select the different snap target: Point, Near, End or Middle.
4: Snap on a selected polygon (one time).
5: Snap on a persistent selected polygon.
6: Move to specific “Z” value.
7: Display RhinoCapture options grid
Azimut toolbar

1 |
2 |
3 |
4 |
5 |
6 |
7 |
8 |
9 |
Figure 3 : « Azimuth » toolbar
Allows azimuth control:
1: Switch ON/OFF the “Azimut” state.
2: Define the azimuth value in degree from (OX) axis (edit box).
3: Set the azimuth value by selecting 2 points.
4: Set the azimuth value by selecting a segment.
5: Add 90° to the current azimuth value.
6: Create a “Guide line” by selecting 2 points.
7: Create a “Guide line” by selecting a segment.
8: Disable the « Guide line(s) » (remove guide line action).
9: Set the “Radius” value (edit box)
Editing toobar

1 |
2 |
3 |
4 |
5 |
6 |
7 |
8 |
9 |
10 |
11 |
12 |
13 |
14 |
Figure 4 : « Editing » toolbar
Allows editing control:
1: Copy a selected object.
2: Move a selected object.
3: Rotate a selected object.
4: Move a curve's vertex.
5: Insert a new vertex.
6: Convert a curve into a polygon.
7: Verify closed curve(s) coplanarity.
8: 3d intersection of two lines.
9: Extend a line segment (only on open polyline).
10: Split polyline(s) (polygons) by a curve(s).
11: Measure the 2d distance between two points.
12: Measure the 3d distance between two points.
13: Measure the “height” variation (z value) between two points
14: Refresh SummitEvolution display.
Templates and Drawing toolbar

Figure 5 : « Templates and Drawing » toolbar » toolbar
A Multi-tab « Drawing Templates » toolbar with adaptive pictures size items from 32 to 512 pixels (size can be set from “Options grid”).
New options setting grid
|
|
Figures 6 and 7 : new « options » grid |
|
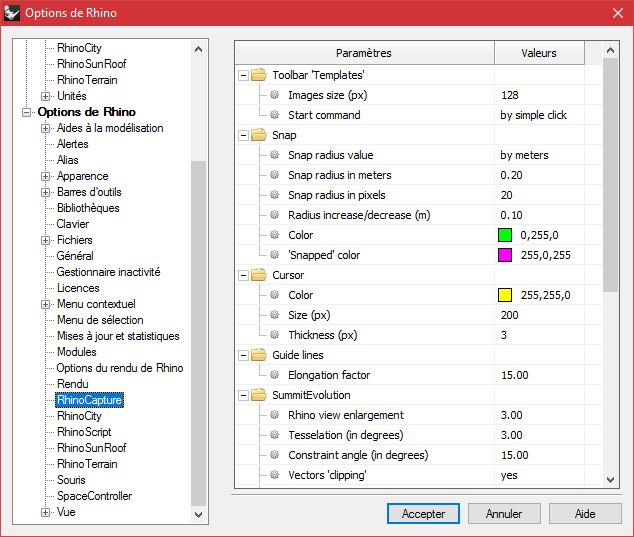
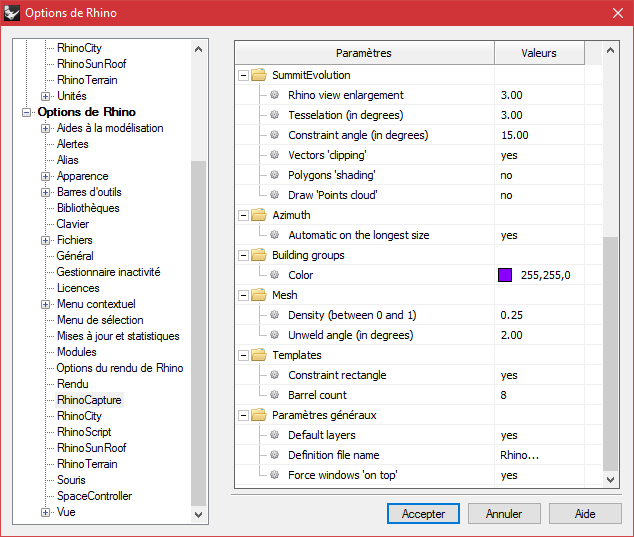
All RhinoCaptureTM parameters are now grouped into Rhinoceros Option panel.
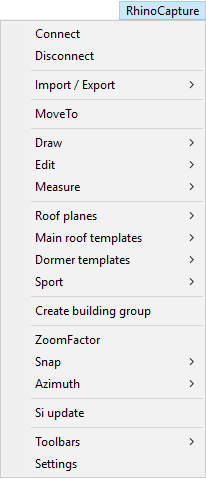
Revised menu
RhinoCaptureTM menu was clarified, reorganized and completed with new commands.
Figure 8 : main menu |
|
|
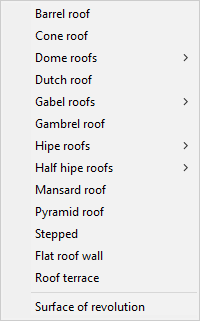
Figure 9 : sub menus « Main roof templates / Gabel roofs» |
||
Dynamic templates
Orderless capture
Roof templates are now « dynamics ». This means that roof’s points capture is orderless. Moreover you can view dynamically the roof shape during mouse move.
New templates
You can check out all the new templates into the toolbar. (Triangle, Roof terrace, Duch roof, …).
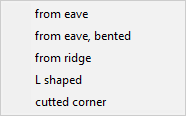
Roof “variation” was introduced to create “bented” versions of the major templates.

For some roofs, we allowed starting from eave or from ridge.
New features
Automatic layers
Default layers created when RhinoCapture start are now configurable. Theses layers can be associated to a GIS feature class of objects. Objects classes are also automatically created, whatever their attributes schema.
By default, the 2 usual layers/classes “Building” and “RoofPrint” are created. But this can be easily modified and extended using a simple configuration file.
Move / add vertex
Any vertex of a polygon can be moved. A vertex can also be added to a polygon. Both in a “coplanar” mode if needed.
Split polygon
Any 3d polygon can be splitted by a set of curves.
Import/Export ShapeFile
Read and write Shapefile (.shp) file added.